We’ve helped dozens of teams launch AI-based features into production, often assisting with their first implementation. We’ve also built our own AI-powered features, like our prompt generator.
Building with LLMs can feel overwhelming, especially if it’s your first time managing the process end-to-end. From picking the right model to deploying it to users, there are a lot of moving parts.
This guide is here to help teams ship LLM-based features quickly, while also providing a baseline level of testing to cover your bases.
Throughout this guide, we’ll use our prompt generator as an example, highlighting each step and how we approached it.
Defining success criteria
Before picking a model or even testing prompts, it’s important to define what success looks like for your LLM feature or application. Clear success criteria give you a north Star to work towards.
Success criteria should be:
- Specific: Clearly define your goal. “Increase chatbot accuracy by 20%” instead of “improve responses.”
- Measurable: Use quantifiable metrics, like accuracy rates, response times, or F1 scores.
- Achievable: Goals should be realistic, based on current model capabilities and constraints.
- Relevant: Align the criteria with user value and the core use case.
- Time-bound: Set deadlines to maintain momentum and measure progress.
Examples of Success Criteria
Let’s define a single success criteria for the Prompt Generator:
Common metrics for success criteria
When thinking about what success criteria should apply to your project, here are a few examples that could be relevant.
- Task fidelity: Does the output align with the task’s intent?
- Consistency: Are similar inputs producing similar outputs?
- Latency: Is the response time acceptable?
- Accuracy: Can accuracy be measured with metrics like F1 score for classification tasks?
- User satisfaction: Gather feedback directly from your users.
- Relevance and coherence: Does the output logically address the input?
- Cost: Is the setup scalable and affordable if usage increases tenfold?
Developing test cases
Test cases are the backbone of any LLM evaluation process. Evaluations are only as effective as the test cases you run them against.
Good test cases should cover both common inputs and edge cases. Weird things happen in production, and users will input things you probably can’t even think of upfront.
1. Start with common scenarios
Begin by creating test cases that reflect what you think will be common inputs—aka the “happy path.”
Example for Prompt Generator:
- Input: “Generate short blog posts based on the content provided”
2. Include edge cases
Generate test cases that cover unexpected use cases where your model might fail or behave unexpectedly. These can include:
- Ambiguous inputs: Test how the model handles vague or unclear prompts.
- Example: “Generate something useful for me.”
- Contradictory inputs: Check how the model resolves conflicting details.
- Example: “I want a Claude prompt, but make it OpenAI-specific.”
- Irrelevant or incomplete data: See how the model responds when key information is missing.
- Example: “Make a prompt for… uh, something -related.”
3. Leverage LLMs to generate test cases
Manually creating test cases is a great starting point, but LLMs can help you scale quickly. Use a baseline set of inputs and prompt the model to generate variations.
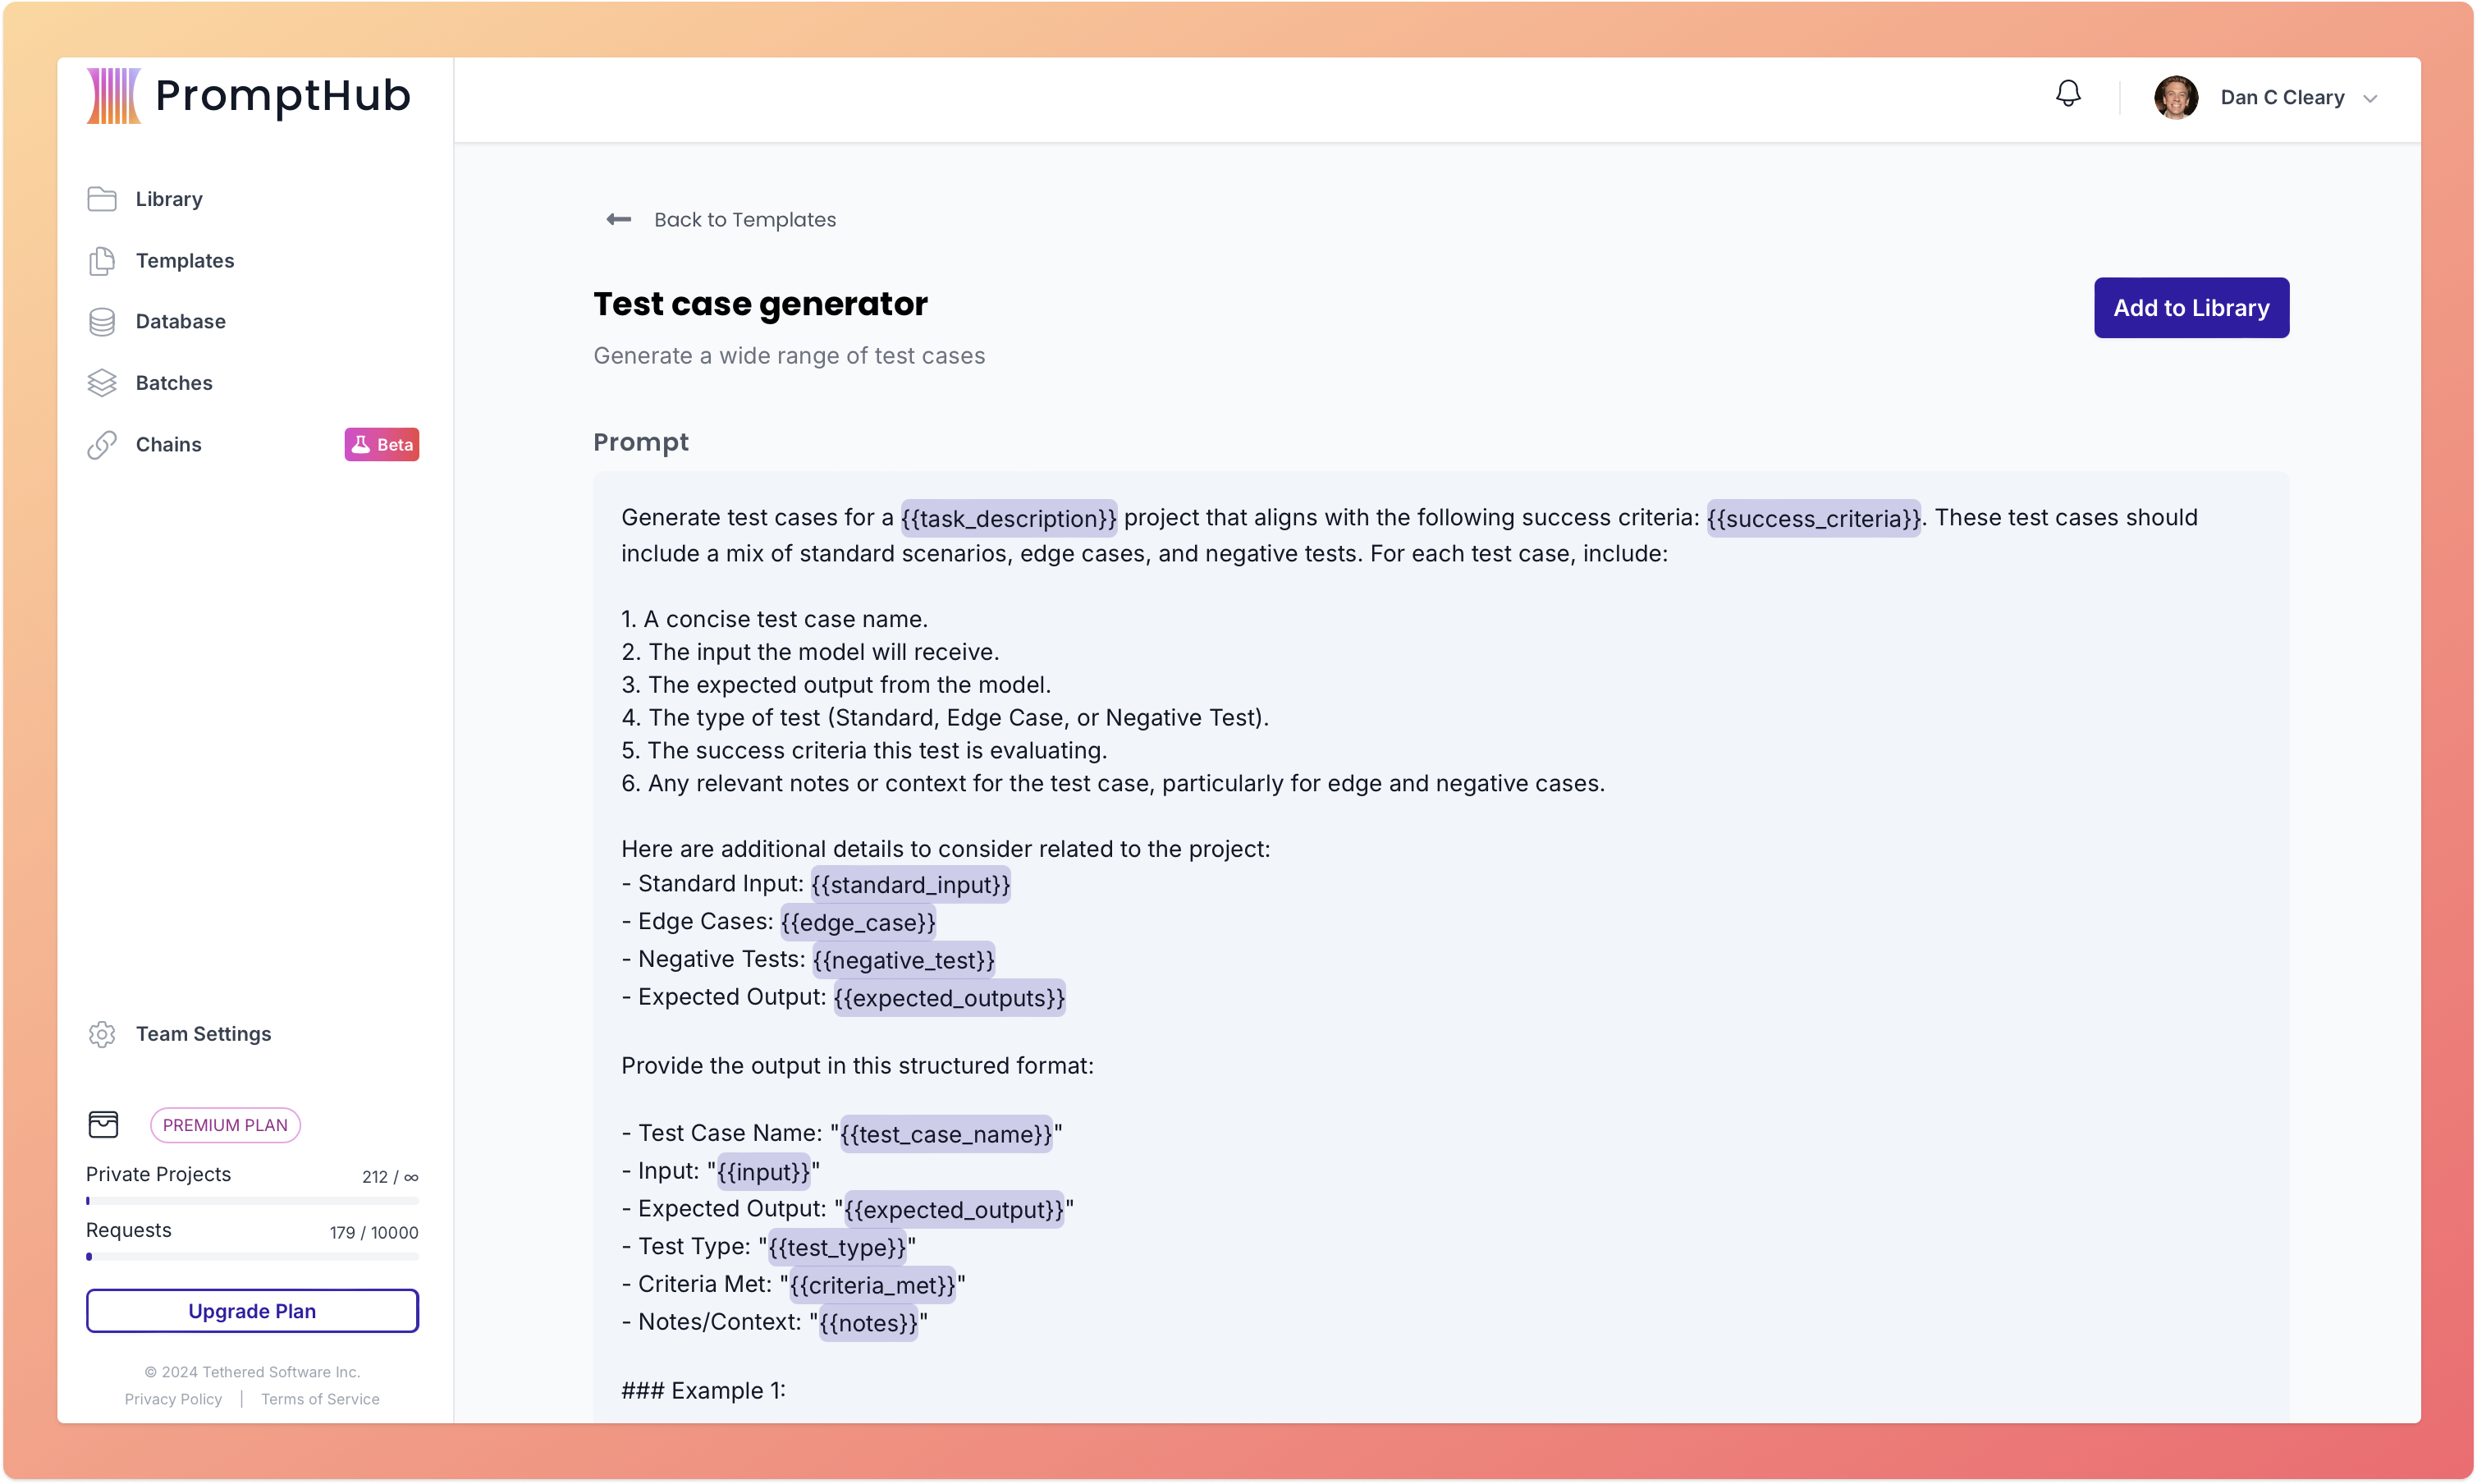
Using a PromptHub form we built, you can generate test cases that cover happy paths and edge cases. Try it via this link.
Here is the template used to power the form.
4. Test with real-world inputs
Only available after launch, but adding real user inputs to your test cases is a great way to continually expand and increase the strength and “realness” of your test cases.
5. Iteratively expand your test suite
Building a strong test suite is an iterative process. Add a new test case for every failure or unexpected result to address and prevent similar issues in the future.
Test cases for the prompt generator
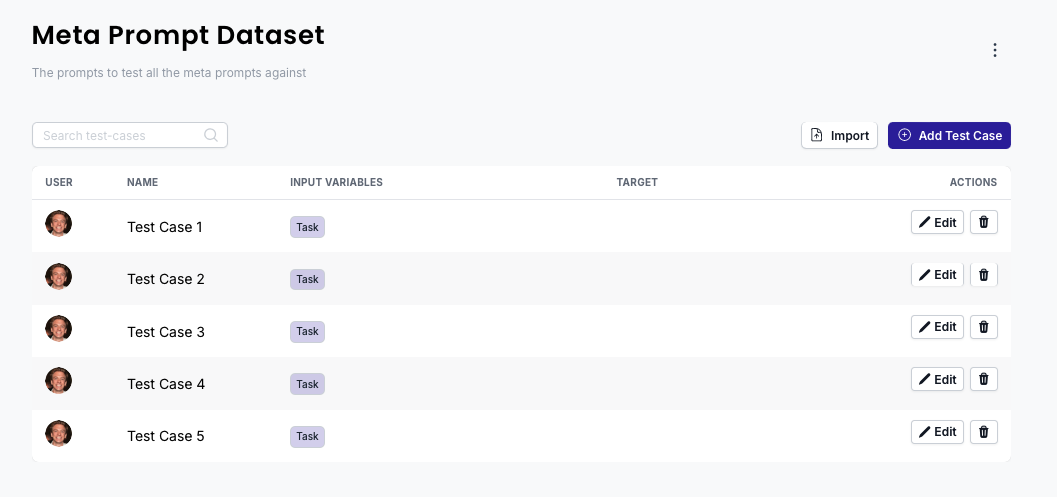
For the Prompt Generator, we developed test cases that mirrored real user inputs and expectations. Here’s how we structured them:
In PromptHub we started with a really small dataset that contained 5 test cases. We gradually built this up over time.
Setting up evals
Once you have your test cases in place, the next step is to measure how well your prompt performs. Evaluations—or evals—provide a structured way to track performance.
Having rigorous evals can be challenging. In the beginning, for a first launch, I think having whoever is the subject matter expert in the project run tests and evaluate outputs via the eye-test is a fine place to start.
Evals are an ongoing process. LLMs evolve, new models are released, and user needs change, so running continuous evals ensures your feature remains reliable and aligned with expectations.
What makes up an eval?
An eval generally consists of four components:
- Prompt: The input you send to the model.
- Output: The model’s generated response.
- Golden answer: The ideal or expected response to compare against.
- Score: A quantitative measure of how closely the output aligns with the golden answer.
Types of eval grading methods
Evals are extremely task-specific. As mentioned earlier, the eye test is a perfectly fine way to start when you need to move quickly. If you want to have your evals be a little more robust, here are the three primary methods:
- Code-based grading: Fast and rule-based, it checks for exact matches or specific key phrases in outputs. Good for simple, structured tasks like classification or sentiment analysis.
Example for prompt generator: Ensuring that outputs follow specific model structures (e.g., XML tags for Claude). - Human grading: Flexible and nuanced, not as fast as other automated methods. Also known as the eye-test, or vibe checks. I think this type of evaluation is fine for getting things off the ground
Example for prompt generator: Human evaluators (me) reviewing outputs by hand - LLM-based grading: Using another LLM to evaluate outputs based on predefined criteria, easy to scale. There are some gotchas to be aware when doing this.
For example, if you ask an LLM to rate something on a scale from 1 to 5 without providing examples of what a 1 or a 5 looks like, it may struggle.
Tasks that fall between rigid rules and subjective judgments, such as tone, coherence, or relevance.
Initial model selection
The first step in choosing a model is narrowing down your options based on broad, objective criteria. With so many models available, it’s important to evaluate them systematically before diving into detailed testing.
At this stage, the goal isn’t perfection. The aim is to create a shortlist of models to begin prompt engineering. This could mean just picking the latest two or three models from the top providers.
A practical framework for choosing an initial model
Here is a short framework to help you narrow down the models into a shortlist for your use case:
- What is the primary task?
- Example: Generating prompts, summarizing content, or code generation.
- What constraints do you have?
- Cost: How cost sensitive are you?
- Latency: How quickly do you need responses?
- Hosting: Do you need the model on secure infrastructure like Azure or AWS Bedrock?
- Scalability: Can the model handle increased usage as your feature grows (Current RPM limits, etc)?
Selecting a model for the prompt generator
In PromptHub, you can test and write prompts against a variety of models, and each model has slightly different best practices when it comes to prompt engineering. For example, it’s well known that Claude loves XML tags, while OpenAI models excel with natural language instructions.
When building the Prompt Generator, our goal was to ensure that:
- Each model generates prompts that align with its specific quirks and strengths.
- Users get high-quality, tailored results results based on their chosen model provider.
With this in mind, we used our model selection framework to narrow our options
1. Define our requirements
- Primary Task: Generate high-quality, model-specific prompts based on task descriptions.
- Constraints:
- Cost: Not very cost sensitive
- Latency: Must support fast, real-time generation.
- Hosting: No hosting requirements, can call model provider APIs directly
- Flexibility: Prompts need to align with model-specific best practices.
- Breadth: Support for the most widely used providers (OpenAI, Anthropic, Google).
Since cost and infrastructure weren’t constraints, we prioritized performance and speed.
2. Narrowing down our options
Since the Prompt Generator needed to support multiple providers, we focused on their latest and most capable models. For each provider, we selected both their highest-performing model and their fastest model for comparison. At the time those models were:
Prompt engineering
Now for my favorite part, good old prompt engineering. Now that we have test cases and some models we want to test against, there’s nothing left to do but start iterating on prompts.
Starting with the first version of your prompt
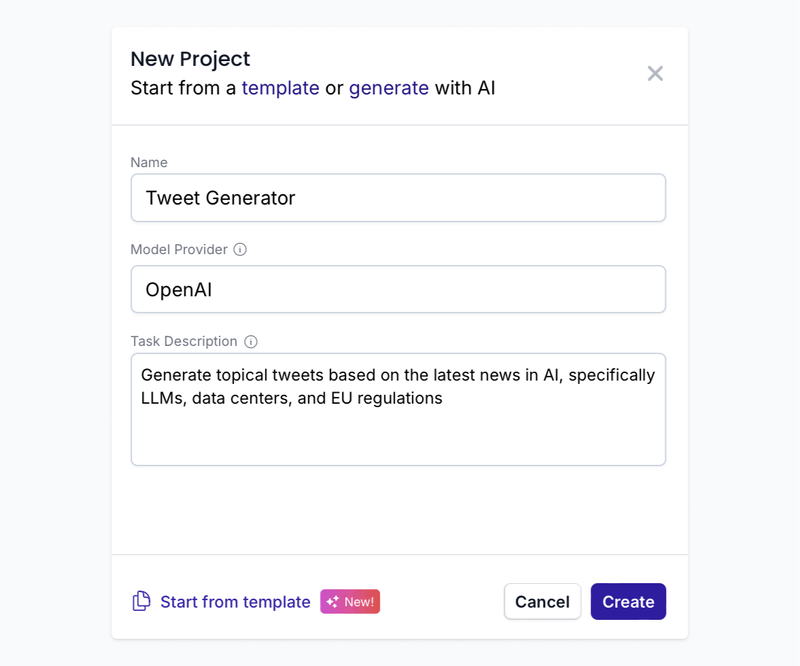
Rather than type out a first version of a prompt, I’ll often just use the prompt generator in PromptHub to kick-start the process.
Testing models side-by-side
With an initial prompt, next up is testing it across the short list of models you made earlier.
For the prompt generator, I worked on three prompts, one for each provider we aimed to support in the initial launch: Google, Anthropic, and OpenAI.
So I went ahead and tested each prompt, across two models, for each provider.
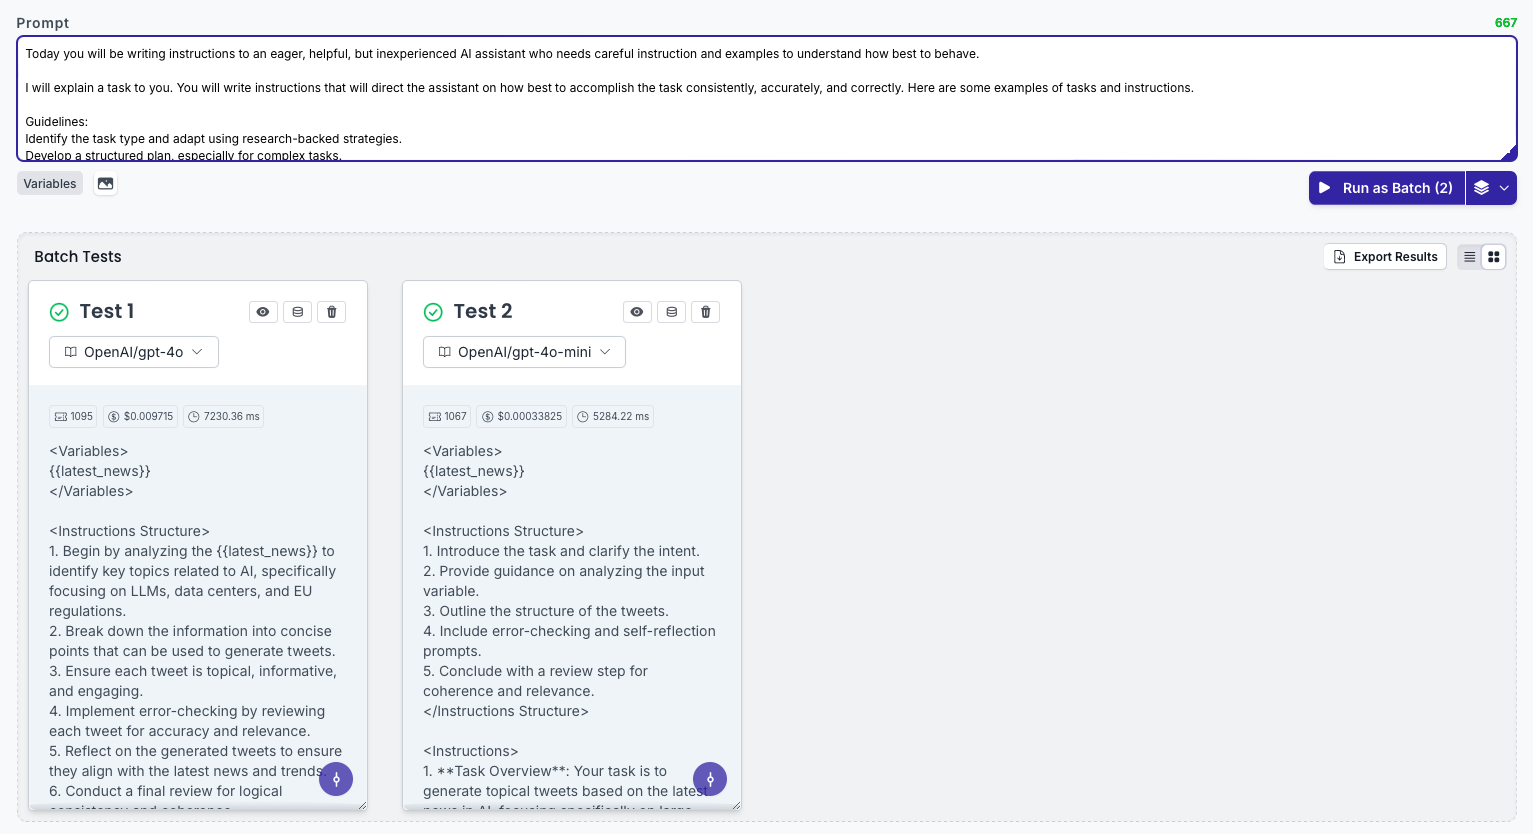
When narrowing down the model, it’s important to hold everything else constant, including variable data and parameters. The only thing you should change is the model, so that you can best isolate the performance differences.
Additionally, in this part of testing, you need to test each model many times, to account for the inherent variability of LLM outputs.
Test across datasets
Once you’ve nailed down which model you want to use you’ll probably still need to iterate on the prompt to get it to consistently give you the output you’re looking for. Once the prompt is working consistently, you should create a commit, or save your progress in some way since you’ve reached a naturally stopping point.
Next, you’ll want to test across those test cases you put together to ensure that the model works in a variety of use cases.
You’ll most likely find situations where the prompt and/or the model fails and you’ll need to get back to iterating. It’s all part of the process.
Typical prompt engineering errors
Prompt engineering can be challenging and can require perseverance! Here are some of the most common issues you’re likely to encounter, even with the latest and greatest models.
1. Formatting issues
Issue: The model’s output doesn’t follow the desired structure (e.g., JSON, XML).
Solution:
- Be explicit about formatting requirements.
- Use the structured_outputs feature when available
- Provide examples via few shot prompting in the prompt to guide the output.
2. Hallucinations
Issue: The model invents or fabricates information.
Solution:
- Add constraints to the prompt:
- “Use only the information provided in the task description.”
- Add a step for self-checking outputs:
- “If unsure, request clarification instead of assuming details.”
- Use a second prompt in a prompt chain to check and verify the first model’s response
3. Style and tone mismatches
Issue: The output doesn’t align with the expected style or tone.
Solution:
- Specify a tone by assigning a persona
- Use few shot learning to show the model how the output should sound, rather than tell it
4. Accuracy problems
Issue: The output simply isn’t accurate
Solution:
- Use Chain-of-Thought (CoT) prompting to improve reasoning
- Use prompt chains to verify outputs before sending them back to users
- Give models a chance to say they don’t know the answer if they are unsure
Prompt engineering patterns and methods
It is always important to test any prompt engineering method rather than blindly use it in your prompt. Not every method will improve performance across all tasks. For example, there has been some recent research that shows that few-shot prompting with reasoning models can decrease performance (more info here: Prompt Engineering with Reasoning Models).
With the disclaimers out of the way, here are some of the most effective prompt engineering methods.
- Few-Shot Prompting: Provide examples in the prompt to guide the response. Show, don’t tell. Might be less effective for reasoning models
- Chain-of-Thought (CoT) Prompting: Break complex tasks into reasoning steps.
- Meta Prompting: Leverage prompt generator tools to help you write prompts
Here are a few lesser-known methods that are worth exploring
- System 2 Attention Prompting: Encourage deliberate, slow reasoning.
- Analogical prompting: Enable the model to self-generate examples
Structuring prompts for prompt caching
Structuring your prompt to make the most of caching can save you up to 90% on input token costs. The general rule of thumb here is to have the static content come first in your prompt, followed by the variable content. This maximizes the likelihood of a cache hit.
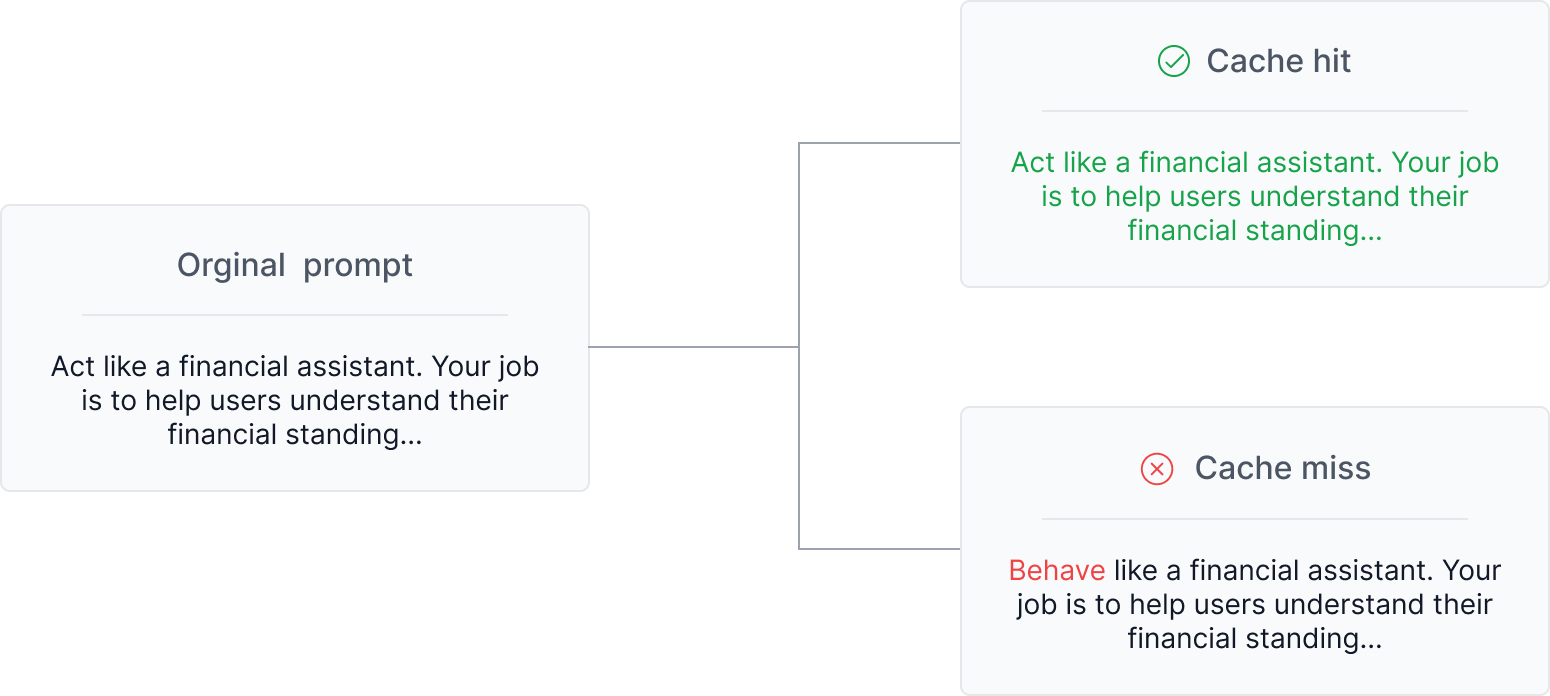
Unfortunately, each model provider handles prompt caching differently. Some do it automatically, others require code changes For more info, check out our guide here: Prompt caching with OpenAI, Anthropic, and Google Models
Deployment strategies
Now that you’ve done some testing and your prompt is working well, it’s time to get it out there to users. So should you just hard code your prompt into your codebase? Probably not.
Decoupling prompt engineering from software engineering will make it easy to make prompt changes without requiring deploying code. Instead of hard-coding prompts, pull them from a centralized repository, such as PromptHub.
This allows non-technical team members to test prompts across new models and edge cases, then push updated variants without requiring developer involvement.
New model just drop? No problem you can simply update the model used in PromptHub, commit the changes, and it will update in your application.
By integrating your application with an API or repository, the latest prompt versions can be fetched directly, streamlining the iteration process.
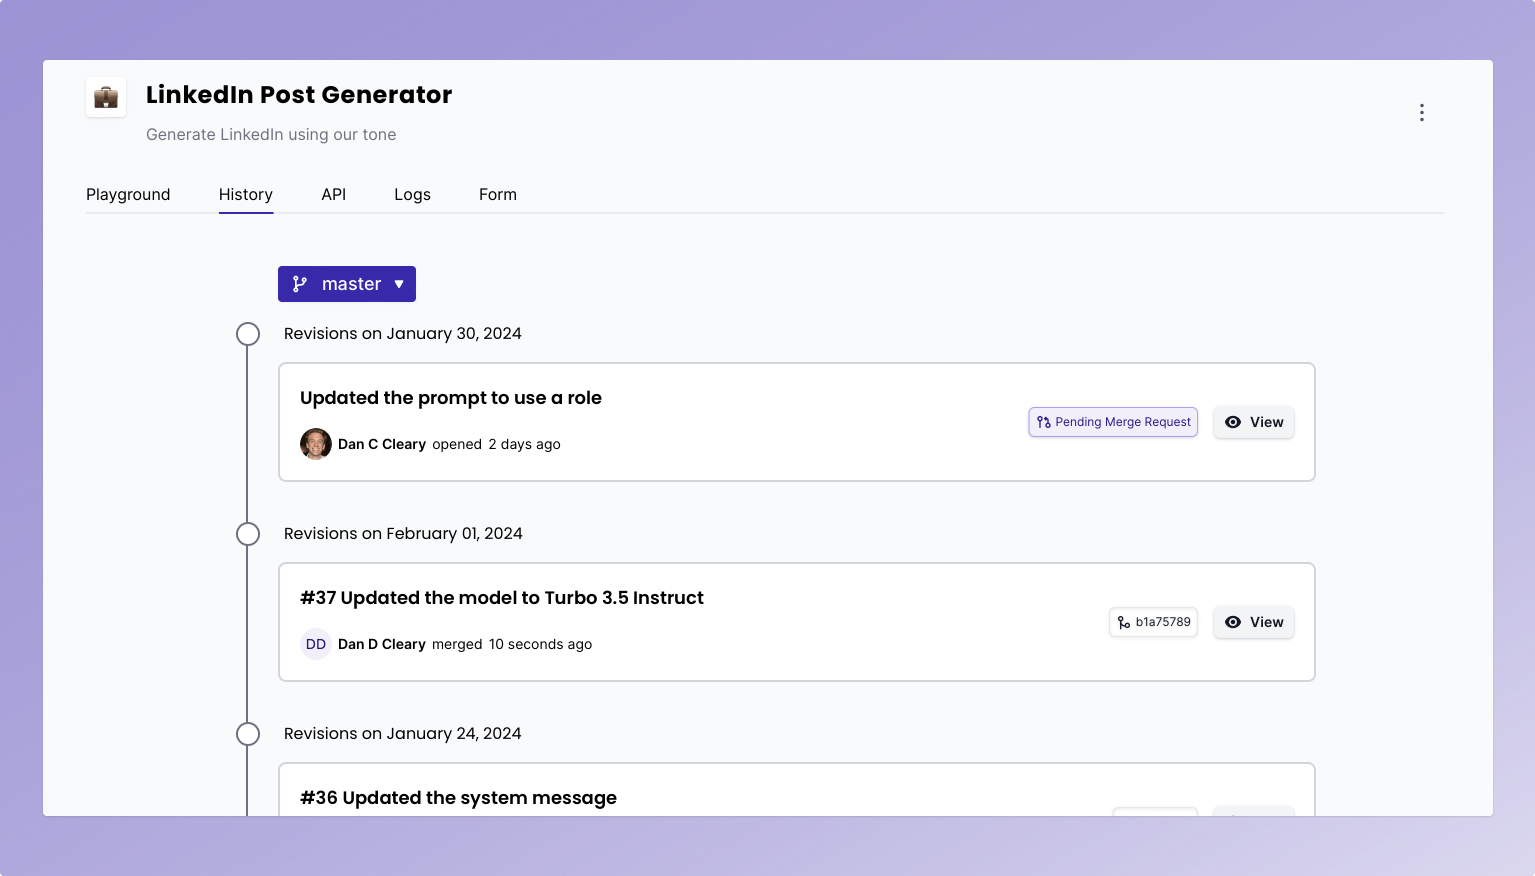
With PromptHub’s Git-style versioning, you can even push a new prompt version to a specific environment via branches. Want to push a new prompt to staging and test it in your QA environment? All you need to do is choose which branch you want to commit on, and you’re good to go.
Monitoring prompts in production
Once your prompt is in production, monitoring requests and analyzing actual user inputs can be really helpful. You should also keep up with your success metrics, as well as talk to your users. Nothing can replace the amount of insight you can get in a short call with an active user.

Conclusion
Launching LLM based features and applications takes some work, but you can create some truly magical experiences. Following the few steps in this guide will put you in a great place to get something off the ground quickly. If you have questions or need help, feel free to reach out!


